
Games that complement controllers don’t need any additional installation. When you attach a controller to your computer, the game would immediately recognize it. The majority of games under Windows 10 are already set up to function with an Xbox controller. The controls would probably have been mapped. Therefore, you can look up whatever key or joystick accomplishes anything in the game’s options.
It’s a fact that most recent Computer games accept controllers. Though, quite a few of them are best played with a keyboard. The controller’s predefined settings might not perform well during the game. You could even circumvent this by mapping a joystick to keyboard keys.
Although the conventional Windows keyboard arrangement has not evolved much over the years. There’s a good possibility that you don’t utilize each button. There are several methods to remap these underutilized buttons.
Why remapping is important?
Remapping the keys of a video game is a useful tool. This can improve your gaming expertise. It will help you to become a better gamer. It will also introduce new people through the game. Regrettably, not every game allows you to customize your controls. Thus, some of them only provide a minimal number of options.
Remapping the parameters in each game is a tiresome task. Only a game allows the gamer to customize the input extensively. Though mapping the controls on the hardware plane is simple, doing it in a game might create difficulties.
Certain modern games may adjust in-game instructions dependent on the hardware settings. However, remapping the controllers won’t affect any on-screen instructions. This will not affect any tutorials in previous games. The simple instructions for the keyboard to controller mapper are listed below.
Remap any key on Windows 10
Previously, remapping keyboards in Windows 10 was difficult. It needed the installation of a complicated third-party application. Microsoft has made it simple using PowerToys. It’s a free program that can be downloaded online. You may use PowerToys to reconfigure shortcuts. Also, enable any button on your keyboard to function like every other key.
Get PowerToys completely free through Github unless you don’t currently own it. Run PowerToys Settings once installing it. Next, pick “Keyboard Manager” from the toolbar. Select “Remap a Key” from the “Keyboard Manager” options.

Select the plus icon (“+”) to apply a fresh key mapping once the “Remap Keyboard” window appears.

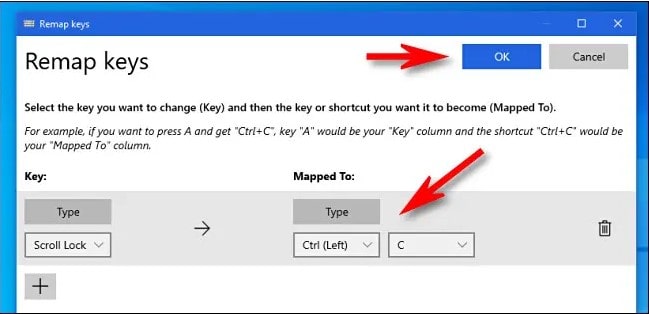
Then, under the “Key:” field, specify the button you wish to remap. Also, which key or shortcut you wish it to accomplish from the “Mapped To:” section. First, from the “To:” section, press the “Type” key. Then push the button from the keyboard. Also, you can choose it from the drop-down option. For example, we’ll employ Scroll Lock because it’s frequently overlooked.
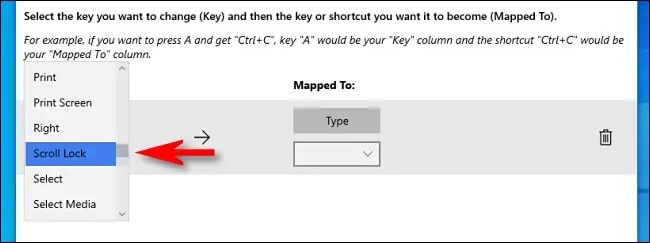
Then, under the “Mapped To” box, choose the button or shortcut you intend to use. You can select an individual key using the drop-down box. Also, you can select the “Type” option, and push the button from the keyboard.
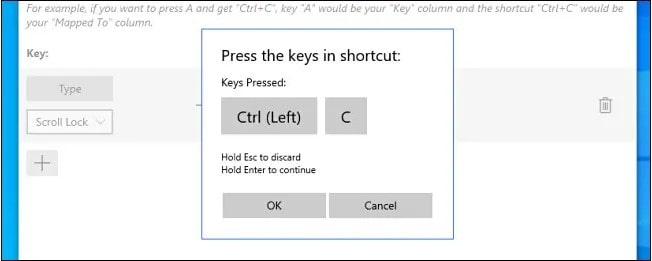
Hit the “Type” option. Next, push the shortcut button mixture from your keyboard. As a reference, for the usual Windows “Copy” shortcut, we use “Ctrl+C.”
Choose “OK” once you’ve specified the “Key:” and “Mapped To:” sections.
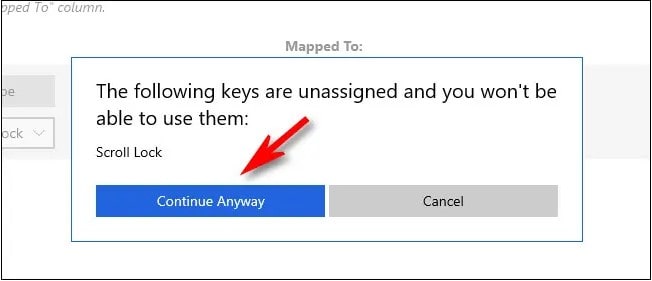
Choose “Continue Anyway” when a warning appears. The warning may suggest that one key might have remained unassigned. This indicates you are not allowed to use the button you recently remapped for its original function.
The completed mapping will then be shown in the “Keyboard Manager” options. That indicates that your customized mapping has already been updated. Now it is currently operational.

Select “Remap a key” once more if you wish to insert multiple mappings. Close PowerToys Options after you’re finished. Your remapped key or keys would stay in place. You can employ them as often as you want. If required, you may easily go back and modify your mappings afterward.
Remap a Keyboard on a Mac
Though you won’t be allowed to change what happens if you push the “F” button from the Mac. You can create customized shortcuts to create it simpler to navigate macOS. This post will show you how to do it.
The System Preferences software on the Mac has several options. It’s for adding shortcuts as well as extra elements to the keyboard.
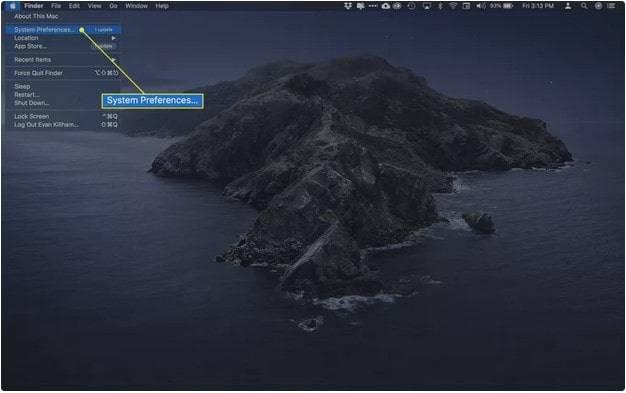
1. Using your Mac, go to the Apple menu. After that, choose System Preferences.
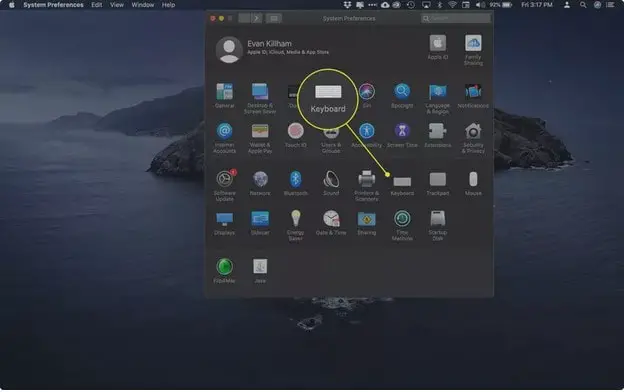
2. Choose Keyboard.
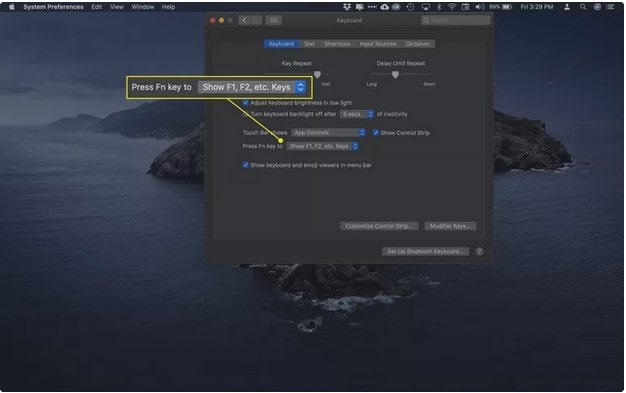
3. At the initial display of a MacBook featuring a Touch Bar, you’ll notice a critical option: tap the Fn key. Other options for this menu are Expand Control Strip. Also, Show Quick Actions and Show Spaces are available. However, you must keep it to Show F1, F2, and so on. Keys to making the following stage go more smoothly.
4. To explore more possibilities, go to Shortcuts.
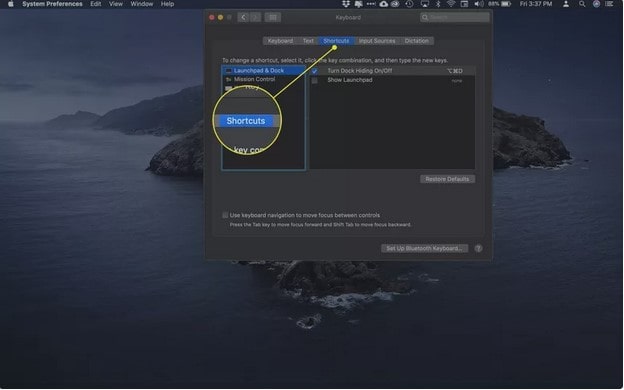
5. The various groups of shortcuts users can create are listed on the left panel. Make and adjust the shortcuts for snapshots, accessibility, and the Function keys by looking through them.
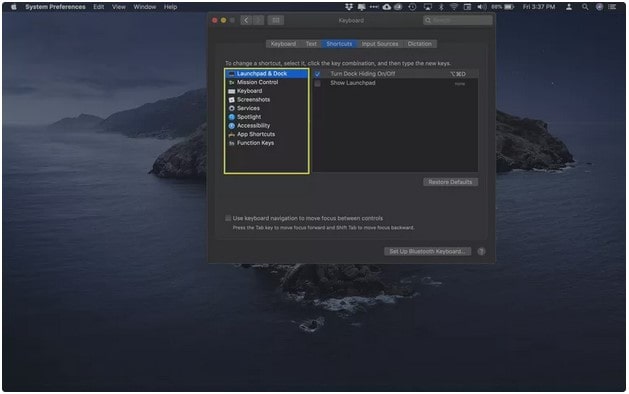
6. As you have located a shortcut you wish to alter. Choose the current key combination from the right.
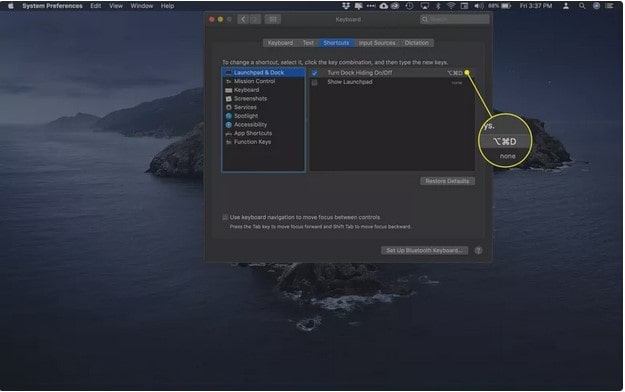
7. Tap the modified combo you would like to use while the button command is underlined.
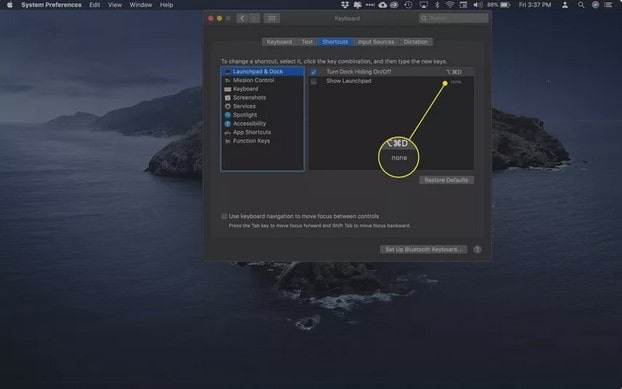
8. The updated shortcut will take the position of the previous one. After that, you can use it right away.
9. Follow these procedures to build or update all the shortcuts you wish. From the right side, a command without any active shortcut would show none.
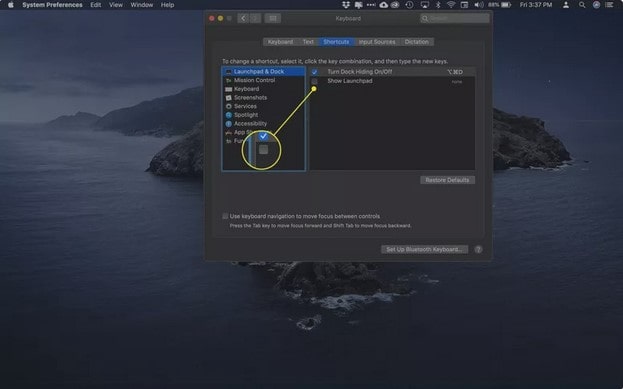
10. You can deactivate a shortcut without removing it. Select it by checking the box beside its title.
Frequently Ask Question (FAQ)
Proceed to General > Game Controller > Customizations through the Settings app. Choose “Enable Customizations” from the drop-down menu. Modify the input choices using the menu. Based on the controller you’re utilizing, you’ll have different options.
Read More:
- How to Disable Function Key in HP Laptop Without BIOS
- HP Pavilion G Series Keyboard Replacement
- Hp laptop function keys not Working
- Keyboard Not Working in BIOS
- Lenovo y700 Keyboard Stops Working
Conclusion
Games that require a keyboard are usually enjoyed with one. You may find it physically impossible to operate a keyboard for extended periods. However, if you prefer a controller or, remapping seems to be the best solution to go. This could require some practice for getting accustomed to the unfamiliar controls. However, if everything is set up properly, you would be ready to enjoy all in-game operations. The above methods will guide you to make changes in keyboard to controller mapper.

I am a regular user of computer keyboards. For using keyboard face different kinds of problems and also solve it very easily. I love sharing knowledge about keyboards.