
You might be a hardcore user of your computer and keyboard for various purposes. There is also a chance that you work from home, and you need to use your keyboard frequently for typing or other commands. No matter what the scenario is, the keyboard can get clogged up with crumbs and get sticky to press the buttons.
If that is the case, you must clean the keyboard to use it properly when required. You can clean it by removing the keys, but re-arranging them will be a hassle after cleaning. If you want to avoid that hassle, you must get to know how to clean sticky keyboard without removing keys.
The Tools and Materials Required to Clean the Sticky Keyboard without Removing the Keys
You might think that detaching the keys from your keyboard will let you clean the keyboard thoroughly. But it is not like that; you can clean the keyboard without separating the keys. The efficiency of cleaning the keyboard with or without removing the keys is quite identical.
But the thing that makes the difference is re-arranging the keys in the proper order when you are done cleaning. Sometimes, you might end up arranging the keys in the wrong order or even damage the switches. So, cleaning the sticky keyboard with the keys on is comparatively a better idea.
As you have made up your mind about cleaning the keyboard without removing the keys, you will require some tools and materials. The tools and materials for the process are:
- A Damp Cloth
- Air Blower (Compressed Air Can or Vacuum Cleaner)
- A Keyboard Cleaning Brush
- Clear Tape
- Cleaning Slime
- Antibacterial Wipes
Before you start cleaning the sticky keyboard you have, don’t forget to collect all the equipment and materials. After you collect those, put them in a place you can easily access while dealing with the sticky keyboard.
How to Clean Sticky Laptop Keyboard Without Removing Keys – The Steps to Follow to Get the Job Done
Now, as you have all the tools and materials near your reach, you are all set to start the cleaning task. But you must remember that you need to follow one step after another while performing the task. So, the steps of how to clean a laptop keyboard without removing the keys are as follows:
Step-1: Turn the Laptop Off and Turn it Upside Down
As the laptop keyboard is not detachable, you need to turn the laptop off to start the cleaning procedure. If you mistakenly keep the laptop turned on while cleaning, it can lead to unwanted accidents and damage. So, make sure to detach the power connection of the laptop and then just switch it off.
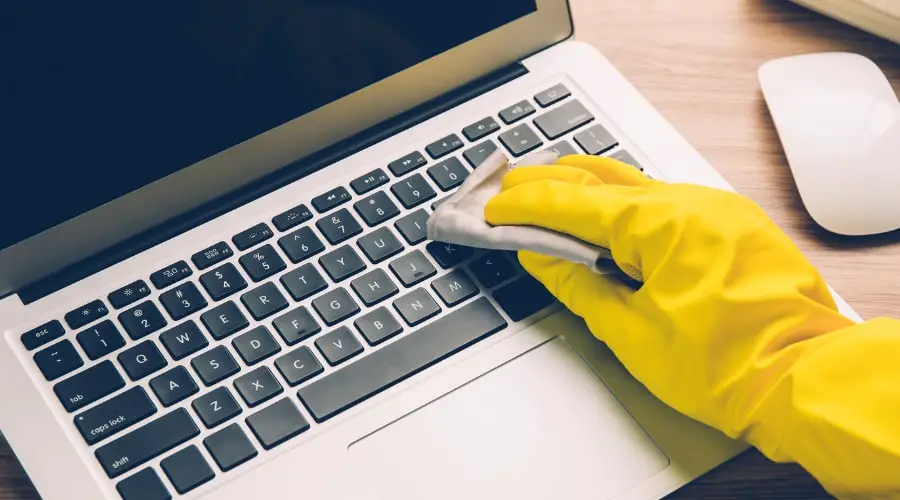
Now, you need to flip the laptop over or upside down and try shaking it lightly. When you do so, all the debris, crumbs, food scraps, lint, etc. Which were hidden loosely between the buttons will fall off. Then flip it over again and take a damp cloth to wipe the keyboard to eliminate the remaining loose dirt and debris.
Step-2: Vacuum the Keyboard
Now in the next step, you need to blow out the dirt and dust which remained after the previous step. For the task, take the air blower in your hand that you kept aside earlier. The air blower can be a compressed air can, a specialized keyboard vacuum, or even a small sofa vacuum, whichever you can manage.
If you use a compressed air can, or the specialized keyboard vacuum, the usual air blow will do the job. But when you use the sofa vacuum, make sure that you are blowing air at its lowest power to suck up the dust remnants.
Step-3: Brush Between the Keys and Apply the Clear Tape
Even if you are dealing with a sticky or clogged keyboard, the loose dust will also be there. Before dealing with stubborn stickiness, you must get rid of the loose dirt and debris. The step above and this very step is very much essential for eliminating that loose dirt.
Take the keyboard cleaning brush and use it to wipe off the dirt between the keys as much as you can. Try wiping with the brush twice or thrice, and then take the clear tape in your hand. Apply the adhesive tape underneath the keys as far as it can reach. Keep the tape there for a minute or two, and then take it off.
Because of the gluey nature of the tape, it will attach some amount of dirt to it. When you remove the tape, you will notice quite a lot of dirt attached to it.
Step-4: Apply the Cleaning Slime on the Keyboard
Now, if you were wondering how to clean a sticky keyboard from inside without detaching the keys, this is the go-to phase. You can purchase the cleaning slime from a shop, or you can also prepare it at home. All you need to have are the necessary ingredients, and then mix them in the proper ratio.
Now, the ingredients are as follows:
- One and a half cups of fresh warm water
- A quarter cup of the borax laundry booster
- Five ounces of white school glue
- Food Coloring (Optional)
Take a bowl and mix all these ingredients in the ratio as stated above. When the mixture is prepared, it will be a soft rubbery element that is non-sticky. Along with that, there will be no liquid element left in it that can damage the laptop or the keyboard.
Now, use this cleaning slime to roll over the keys to catch stubborn dirt, dust, and debris. Because of the softness and flexibility, the slime will reach the smallest hidden corners and inside the keys as much as possible. All the stubborn dirt will be eliminated, and you will get rid of the clogged and sticky keyboard issue.
While cleaning with this slime, you will understand why it is excellent for getting into little spots that are difficult to reach.
Step-5: Use the Antibacterial Wipes and Let the Keyboard Dry
When you are done cleaning, you need to disinfect the keyboard. For the task, use the antibacterial wipes that you gathered in the beginning. Wipe it over all the keys and around them to ensure every corner is adequately disinfected. After wiping, take a dry microfiber glass cleaning cloth and use it to rub the keyboard thoroughly.
After all, these, leave the laptop for a bit to let the keyboard dry. Use the keyboard only then when you are sure that the keys are dried entirely.
How to clean your keyboard and mouse
FAQs
If the laptop keyboard is sticky or clogged, it can cause severe problems. At first, it won’t let you type correctly, and you might see some buttons are entirely not responding to the commands. It can also damage the laptop keyboard permanently, which you can’t even replace as the laptop keyboard is a permanently attached one.
That’s why clean your sticky laptop keyboard as early as possible before it’s too late.
Cleaning the laptop keyboard by removing the keys will bring you no advantage. The cleaning efficiency will remain the same as the scenario where you clean the keyboard without detaching the keys. But the disadvantage of separating the keys is re-arranging those properly.
It is a hassle as you might end up arranging the keys in the wrong order, and you need to arrange those again from the beginning.
Final Words
The more you use the keyboard of your laptop, the chances of it getting dirty also get higher. If you don’t clean it often, the keyboard buttons can get sticky and clogged. When the problem reaches that point, you must clean the keyboard as soon as you can before it gets permanently damaged.
Now, as detaching the keys is a hassle, you might wonder how to clean sticky laptop keyboard without removing keys. It is very much possible to clean every corner of the keyboard while the keys are still in their places. All you need to do is perform every step correctly, along with being careful not to damage the keyboard.

I am a regular user of computer keyboards. For using keyboard face different kinds of problems and also solve it very easily. I love sharing knowledge about keyboards.