
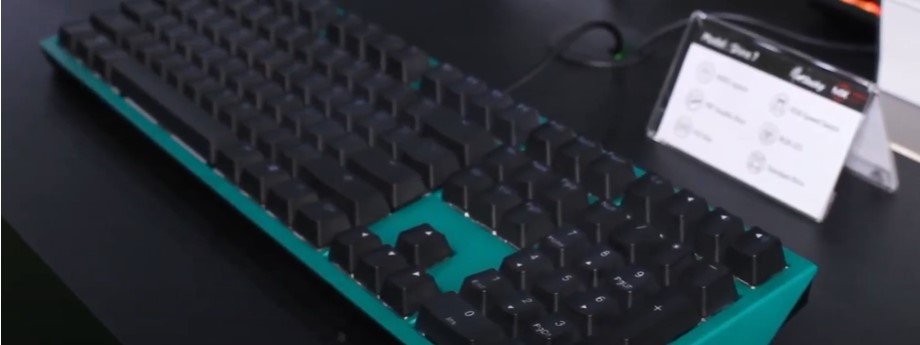
Are you a proud owner of a Ducky keyboard? These mechanical wonders are known for their exceptional quality and performance, offering a delightful typing experience.
However, to maintain their optimal functionality, it is crucial to keep them clean and well-maintained.
Over time, dust, debris, and even accidental spills can accumulate, affecting the keyboard’s performance and longevity.
Fortunately, cleaning a Ducky keyboard is a relatively simple task that can be done with a few essential tools and a little know-how.
In this article, we will provide you with a step-by-step guide on how to clean your Ducky keyboard, ensuring that it stays in pristine condition and continues to deliver that satisfying tactile feedback with each keystroke.
To clean your Ducky keyboard, start by shutting down and disconnecting it. Remove the keycaps and clean them with soapy water. Use compressed air to remove dust from the keyboard body. Wipe the body with a cloth dampened with isopropyl alcohol. Reassemble and test the keyboard.
Understanding the Ducky Keyboard
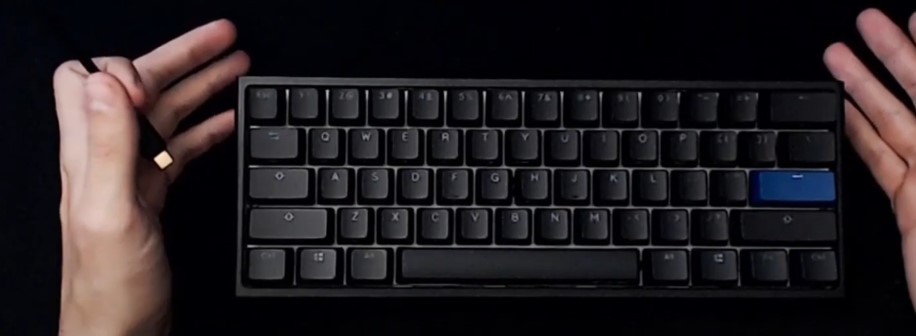
The Ducky keyboard is a high-quality mechanical keyboard known for its exceptional build quality, durability, and customizable features.
Ducky keyboards are known for their reliable Cherry MX switches, which provide satisfying tactile feedback and durability.
They often come with customizable RGB lighting options, programmable macros, and advanced features like Ducky Macro V2.
With their sleek design and robust construction, Ducky keyboards have gained a reputation for their performance and longevity.
The Importance of Cleaning Your Ducky Keyboard
Keeping your Ducky keyboard clean is not just about aesthetics; it also plays a crucial role in maintaining its performance and longevity.
Here are several reasons why regular cleaning is essential:
Maintaining Optimal Performance:
The spaces and crevices between the keys on your Ducky keyboard can gather dust, grime, and debris over time.
This buildup can interfere with the smooth movement of the keys and impact your typing experience.
Preventing Malfunctions:
Dust and debris can cause keys to get stuck in the pressed position or prevent them from registering keystrokes altogether.
Cleaning your Ducky keyboard regularly can prevent these issues and maintain its functionality.
Extending Lifespan:
Ducky keyboards are built to be durable, but neglecting proper cleaning and maintenance can shorten their lifespan.
Dust and debris can taint the sensitive mechanical switches, making them less responsive or hastening their wear and tear.
Hygiene and Health:
Keyboards, including Ducky keyboards, can harbor bacteria, germs, and allergens. These contaminants can accumulate over time and pose a potential health risk, primarily if you frequently use your keyboard or share it with others.
Preparing for Cleaning
Before you begin cleaning your Ducky keyboard, you need to follow a few crucial measures to ensure a quick and efficient cleaning procedure.
Gathering the necessary supplies
- To clean your Ducky keyboard, you’ll need the following supplies:
- Microfiber cloth
- Cleaning solution (mild soap or keyboard-specific cleaning solution)
- Compressed air canister
- A soft brush or cotton swab
- Warm water
- Keycap puller (optional)
- Bowl or container for soaking keycaps
Disconnecting the keyboard
To avoid any damage or accidental key presses during the cleaning process, it’s crucial to disconnect your Ducky keyboard from the computer.
Remove the USB cable from your computer, or switch off and remove the batteries from a wireless keyboard.
Cleaning the Keyboard Body
The first step in cleaning your Ducky keyboard is to clean the exterior, including the keyboard base and the keycaps.
1. Removing dust and debris
Start by gently shaking your keyboard upside down to dislodge any loose debris or crumbs.
After that, blow any leftover dust from the keycap gaps and keyboard crevices with a can of pressurized air.
2. Using a microfiber cloth and cleaning solution
Dampen a microfiber cloth with a small cleaning solution or mild soap diluted in warm water. Clean the keyboard base and the sides of the keycaps by carefully wringing out any excess liquid.
Avoid applying excessive moisture to prevent damage to the keyboard’s electronics.
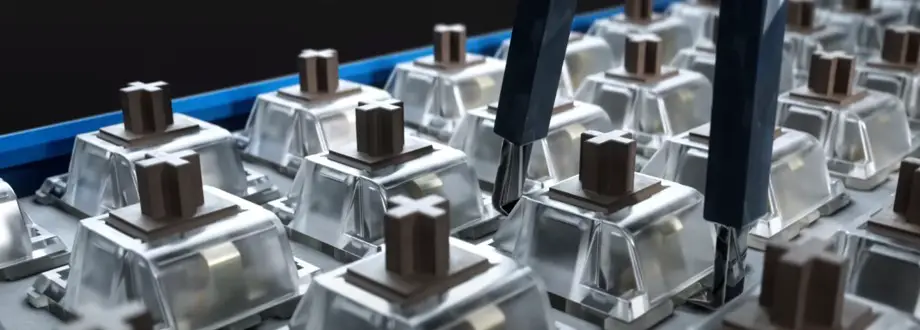
Cleaning the Keycaps
The keycaps are the removable plastic covers on top of the switches. Cleaning them separately ensures a thorough cleaning process.
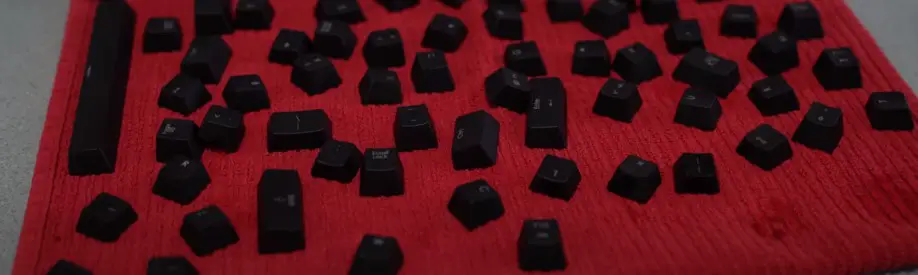
1)Removing the keycaps
If you prefer, you can remove the keycaps to clean them more effectively. Use a keycap puller or gently lift the keycaps using your fingers.
To prevent harming the switches, avoid exerting too much effort.
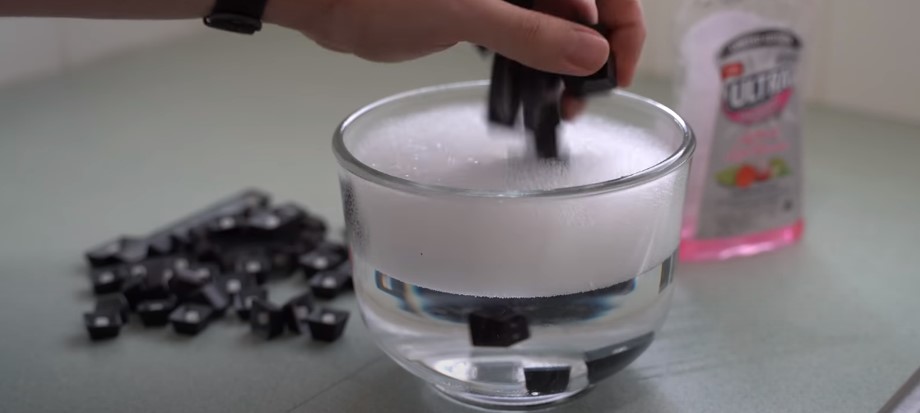
2) Soaking them in warm soapy water
Put some mild soap and warm water in a dish or other container. Place the keycaps in the soapy water and let them soak for a few minutes.
This step helps to loosen dirt and grime.
3) Scrubbing and rinsing the keycaps
Using a soft brush or a toothbrush, gently scrub each keycap to remove any remaining dirt. Rinse the keycaps under running water and wash all the soap residue away.
Place the keycaps on a towel and let them air dry completely before reassembling them.
Cleaning the Keyboard Base
Once the keycaps are removed, you can focus on cleaning the keyboard base thoroughly.
1. Using compressed air
To remove any dust or debris stuck between the switches and the keyboard base, use a can of compressed air.
Use quick air bursts while holding the can upright to prevent excessive moisture buildup.
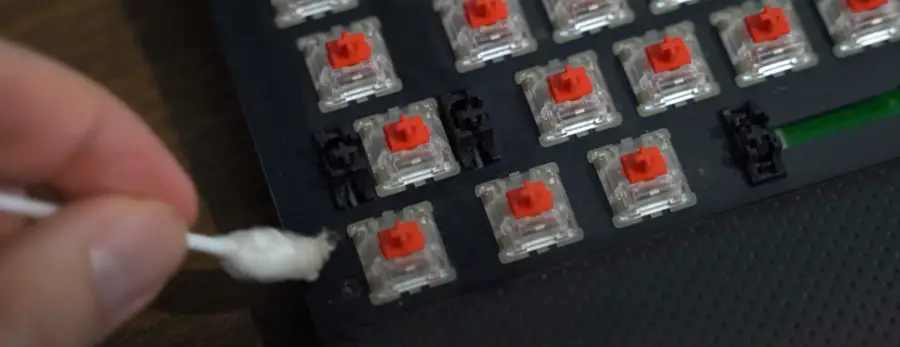
2. Cleaning with a soft brush or cotton swabs
For more stubborn dirt or grime, use a soft brush or cotton swabs moistened with a small amount of cleaning solution.
Gently scrub the keyboard base, paying attention to hard-to-reach areas. Be cautious not to apply excessive pressure, which may damage the switches.
3. Cleaning with Isopropyl Alcohol
Add isopropyl alcohol to a microfiber cloth to make it wet, and gently wipe down the keyboard body.
This helps remove fingerprints, stains, and any remaining grime. Avoid excessive moisture, and make sure the cloth is only slightly damp.
4. Removing stubborn dirt and stains
If there are persistent stains or dirt marks on the keyboard base, you can use a damp cloth with a mild cleaning solution to spot-clean the affected areas.
Ensure the cloth is not dripping wet, and wipe the stains gently until they are removed.
Drying and Reassembling the Keyboard
Once you have thoroughly cleaned the keycaps and keyboard base, it’s time to dry and reassemble your Ducky keyboard.
1. Drying the keycaps and keyboard base
Place the keycaps on a clean towel and allow them to air dry completely. A hairdryer or other heat source should not be used since it could harm the keycaps.
Similarly, ensure that the keyboard base is dehydrated before proceeding to reassemble.
2. Reassembling the keycaps
Once the keycaps are dry, align each with its respective switch and gently press down until it clicks into place. Take your time to ensure all the keycaps are correctly seated and aligned.
3. Reconnecting the keyboard
Finally, reconnect your Ducky keyboard to your computer by plugging in the USB cable or turning on the wireless connection.
Ensure that the keyboard is functioning correctly and all the keys are responsive.
Maintaining a Clean Ducky Keyboard
To keep your Ducky keyboard clean and in optimal condition, follow these tips:
- Dust your keyboard regularly using a microfiber cloth or compressed air.
- Avoid eating or drinking near your keyboard to prevent spills and stains.
- If a spill occurs, immediately disconnect the keyboard and clean it following the steps mentioned earlier.
- Consider using a keyboard cover or protective skin to minimize dust and debris buildup.
- Follow a regular cleaning routine, depending on your keyboard usage and the environment it is in.
FAQs
A: While cleaning the keyboard base without removing the keycaps is possible, removing the keycaps allows for a more thorough cleaning process.
A: It is generally recommended to avoid alcohol-based cleaning solutions as they can damage the keycaps’ printing or the keyboard’s finish. Stick to mild soap or keyboard-specific cleaning solutions.
A: The frequency of cleaning depends on your keyboard usage and the environment it is in.
However, cleaning your Ducky keyboard at least every few months or whenever you notice visible dirt or debris is recommended.
A: No, it is essential to disconnect your Ducky keyboard from the computer before cleaning to avoid accidental key presses and potential damage.
A: It is not recommended to clean the keycaps in a dishwasher, as the heat and water pressure can cause damage. Stick to hand-washing with warm soapy water for best results.
Conclusion
Cleaning your Ducky keyboard is an essential part of its maintenance. Regularly cleaning the exterior, keycaps, and keyboard base ensures a hygienic and smooth typing experience.
Remember to disconnect your keyboard before cleaning and allow all the components to dry completely before reassembling.
Following these steps and maintaining a cleaning routine, your Ducky keyboard will continue serving you well for years.
For the cleanliness and functionality of your Ducky keyboard, Cleaning is advised at least once every few months or whenever there is obvious dirt or debris.
Additionally, incorporate regular dusting using a microfiber cloth and compressed air to prevent buildup. These simple steps will ensure a hygienic and optimal typing experience with your Ducky keyboard.

I am a regular user of computer keyboards. For using keyboard face different kinds of problems and also solve it very easily. I love sharing knowledge about keyboards.