Are you struggling to connect your MX Keys Mini to your Mac? Don’t worry, you’re not alone. Many Mac users find it challenging to pair their keyboard with their device, especially when they’re new to Logitech products.
However, connecting the MX Keys Mini to your Mac is easier than you think. In this article, we’ll provide you with a step-by-step guide to help you connect your MX Keys Mini to your Mac without any hassle.
Whether you’re a student, professional, or casual user, this guide will help you enhance your typing experience and make your work more efficient. So let’s dive in and learn how to connect MX Keys Mini to Mac.
How to connect mx keys to Mac Bluetooth

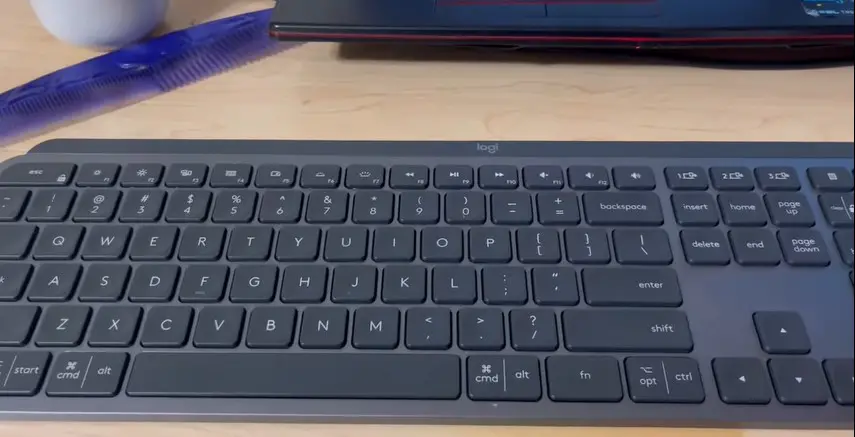
To connect MX Keys to a Mac via Bluetooth, you can follow these steps:
- Turn on your MX Keys keyboard by pressing the power button on the back.
- Press and hold the Bluetooth button on the keyboard until the LED above it starts blinking rapidly.
- On your Mac, click the Apple icon in the top left corner, then select System Preferences.
- Click Bluetooth, then turn it on if it isn’t already.
- Your Mac will start searching for Bluetooth devices. When your MX Keys keyboard appears in the list, click Connect.
- Your Mac will now pair with your MX Keys keyboard. Once the pairing process is complete, the LED above the Bluetooth button on the keyboard will stop flashing.
If you encounter any issues with the pairing process, try resetting the Bluetooth connection on both your Mac and your MX Keys keyboard, updating the Logitech Options software, or checking for interference from other devices.
Step-by-Step Guide to Connecting MX Keys Mini to Mac.

Are you struggling to connect your MX Keys Mini to your Mac via Bluetooth? Don’t worry, we’ve got you covered! In this step-by-step guide, we will walk you through the process of connecting your MX Keys Mini keyboard to your Mac with ease.
Step 1: Turn on your MX Keys Mini keyboard by sliding the power button located on the bottom of the keyboard to the right.
Step 2: Put your MX Keys Mini keyboard into pairing mode by pressing and holding down the Easy-Switch button, located on the top left corner of the keyboard, until the LED above the button starts blinking.
Step 3: Open the Bluetooth settings on your Mac by clicking on the Bluetooth icon in the top right corner of the menu bar or by going to System Preferences > Bluetooth.
Step 4: Make sure Bluetooth is turned on by clicking the “Turn Bluetooth On” button if it’s not already on.
Step 5: Look for the MX Keys Mini in the list of available devices and click on it to connect.
Step 6: If prompted, enter the six-digit code that appears on your Mac’s screen to complete the pairing process.
Step 7: Once the pairing is complete, the LED above the Easy-Switch button on your keyboard will stop blinking and remain lit for a few seconds. This indicates that your MX Keys Mini keyboard is now connected to your Mac.
Step 8: Test the connection by typing something into a document or text field to make sure the keyboard is working properly.
Turn on MX Keys Mini and set it to pairing mode
To turn on your MX Keys Mini and set it to pairing mode with Bluetooth, follow these simple steps:
- Locate the power button on the bottom of your MX Keys Mini keyboard.
- Slide the power button to the right to turn on the keyboard.
- Press and hold down the Easy-Switch button, located on the top left corner of the keyboard, until the LED above the button starts blinking.
- This indicates that the keyboard is now in pairing mode and ready to be connected to a device via Bluetooth.
- Once the MX Keys Mini keyboard is in pairing mode, you can proceed to connect it to your Mac or any other device that supports Bluetooth.
Open Bluetooth settings on Mac and turn on Bluetooth.
To open Bluetooth settings on your Mac, follow these steps:
- Click on the Apple icon in the top left corner of your screen.
- Select “System Preferences” from the dropdown menu.
- Click on “Bluetooth” in the System Preferences window.
This will open the Bluetooth settings on your Mac. If Bluetooth is not already turned on, click the button that says “Turn Bluetooth On” to activate it. Your Mac will now start searching for available Bluetooth devices in the surrounding area.
Find the MX Keys Mini and connect it to your Mac.
Once you have turned on Bluetooth on your Mac and set your MX Keys Mini to pairing mode, follow these steps to find and connect the keyboard to your Mac:
- In the Bluetooth settings on your Mac, look for the MX Keys Mini in the list of available devices.
- Click on the MX Keys Mini in the list to start the pairing process.
- Follow the on-screen instructions to complete the pairing process.
Test the connection.
After you have connected your MX Keys Mini to your Mac, it is a good idea to test the connection to make sure that the keyboard is functioning properly. Here’s how to do it:
- Open a text editor or any other application on your Mac that allows keyboard input.
- Start typing on the MX Keys Mini keyboard to ensure that the keystrokes are registering correctly on your Mac.
- Test out any special function keys or other features on the MX Keys Mini to make sure they are working as intended.
- If everything is working correctly, the MX Keys Mini is successfully connected to your Mac and ready for use.
If you experience any issues or problems with the connection, try troubleshooting the issue by following the steps outlined in the previous section of this article.
Troubleshooting Connection Issues
Sometimes, you may encounter connection issues when trying to connect your MX Keys Mini to your Mac via Bluetooth. Here are some troubleshooting steps you can try:
- Reset the Bluetooth Connection: Sometimes resetting the Bluetooth connection on both the keyboard and the Mac can help resolve connectivity issues. To do this, turn off Bluetooth on both devices, then turn it back on and try to reconnect.
- Update Logitech Options: If you are using the Logitech Options software to manage your MX Keys Mini, make sure it is up to date. You can check for updates by opening the software and clicking on the “Check for Updates” button.
- Check for Interference: Other wireless devices operating in close proximity to your MX Keys Mini and Mac can cause interference, resulting in connectivity issues. Try moving the devices further apart or turning off other wireless devices to see if that helps.
By following these troubleshooting steps, you can hopefully resolve any connectivity issues and enjoy uninterrupted use of your MX Keys Mini with your Mac.
Tips for Using MX Keys Mini with Mac
If you have successfully connected your MX Keys Mini to your Mac, there are a few tips and tricks you can use to make the most out of your keyboard:
- Shortcut Keys: The MX Keys Mini comes with a range of customizable shortcut keys that can help you streamline your workflow and increase productivity. You can customize these shortcut keys using the Logitech Options software, or use the default settings to get started.
- Connecting Multiple Devices: If you have multiple Logitech devices, such as the MX Master Mouse, you can connect them both to the same USB receiver to minimize clutter and free up USB ports. This can be done using Logitech’s Unifying software.
- Customizing Function Keys: The MX Keys Mini also comes with a row of function keys that can be customized to suit your specific needs. For example, you can use the function keys to control media playback, adjust volume, or launch specific apps.
By taking advantage of these tips and tricks, you can make the most out of your MX Keys Mini and enjoy a more productive and efficient workflow on your Mac.
FAQs
Yes, the MX Keys Mini can be used with other devices that support Bluetooth connectivity, such as smartphones and tablets. Simply follow the same steps outlined in this article to pair the keyboard with your device.
According to Logitech, the battery life of MX Keys Mini can last up to 10 days with backlighting on and up to 5 months with backlighting off, based on 2 hours of usage per day. The battery is rechargeable via USB-C cable and can be fully charged in just over an hour.
Quick Guide on How to Connect, Switch and Customise the Logitech MX Keys Mini!
Conclusion
Connecting your MX Keys Mini to your Mac is a simple process that can greatly enhance your workflow. In this article, we provided a step-by-step guide on how to connect your keyboard to your Mac using Bluetooth, troubleshooting tips, and advice on how to get the most out of your MX Keys Mini.
We also answered common questions about the keyboard, including battery life and compatibility with other devices. We encourage readers to give it a try and experience the benefits of using the MX Keys Mini with their Mac. Streamline your work, boost your productivity, and enjoy a more efficient workflow with the MX Keys Mini.

I am a regular user of computer keyboards. For using keyboard face different kinds of problems and also solve it very easily. I love sharing knowledge about keyboards.
