
Are you tired of your current keyboard’s limitations and longing for a refreshing typing experience on your mobile device? Look no further! Finding the perfect keyboard is paramount in this digital era, where communication is key. You’re in the right place if you’ve been considering switching from TouchPal Keyboard to Google Keyboard. Say goodbye to frustration and hello to efficiency as we embark on a journey to transform your typing game.
This guide will navigate the ins and outs of transitioning from the TouchPal Keyboard to the highly acclaimed Google Keyboard. Get ready to unlock a world of enhanced features, seamless customization, and unparalleled typing comfort. So, grab your device, put on your typing gloves, and let’s dive into the real keyboard revolution!
To change from TouchPal to the Google Keyboard, follow these steps: Open the Google Play Store or visit Google’s website. Search for “Google Keyboard” and install the official app. Go to Settings > Language and Input > Virtual Keyboard. Select “Google Keyboard” as your default keyboard.
Assessing the Need for Change
Before embarking on the journey of changing from TouchPal Keyboard to Google Keyboard, assessing the need for this switch is essential. Take a moment to reflect on your current keyboard experience. Are you frequently encountering autocorrect errors? Do you find the lack of customization options limiting?
Consider the features and functionalities that attract you to Google Keyboard, such as its intelligent text prediction and sleek design. By evaluating the need for change, you can determine if Google Keyboard aligns better with your typing preferences and requirements. Embrace the opportunity to enhance your typing experience and unlock a world of possibilities with Google Keyboard.
The Benefits of Google Keyboard
Google Keyboard, also known as Gboard, offers many benefits that enhance the typing experience on Android devices. Here are the key advantages of using Google Keyboard:
- Seamless Integration: Google Keyboard seamlessly integrates with other Google services, allowing quick access to features like Google search, GIFs, and language translation directly from the keyboard.
- Smart Predictions and Corrections: The keyboard’s intelligent algorithms provide accurate predictions, auto-corrections, and contextual suggestions, resulting in faster and error-free typing.
- Gesture Typing: Google Keyboard supports gesture typing, enabling users to glide their fingers across the keys and making typing effortless and efficient.
- Multilingual Support: With Google Keyboard, users can effortlessly switch between multiple languages, making it ideal for individuals who communicate in different languages or work with international colleagues.
- Diverse Emojis and Stickers: The keyboard offers a vast collection of emojis, stickers, and GIFs, allowing users to express themselves creatively during conversations.
- Customization Options: Google Keyboard provides various customization options, including themes, keyboard layouts, and key shapes, allowing users to personalize their typing experience.
- Voice Input: The keyboard offers voice input functionality, allowing users to dictate text messages, emails, or other content using voice commands.
In summary, Google Keyboard combines seamless integration, intelligent features, multilingual support, customization options, and voice input to give users a powerful and user-friendly typing experience on their Android devices.
Installing the Google Keyboard
To install the Google Keyboard on your device and replace TouchPal, follow these simple steps:
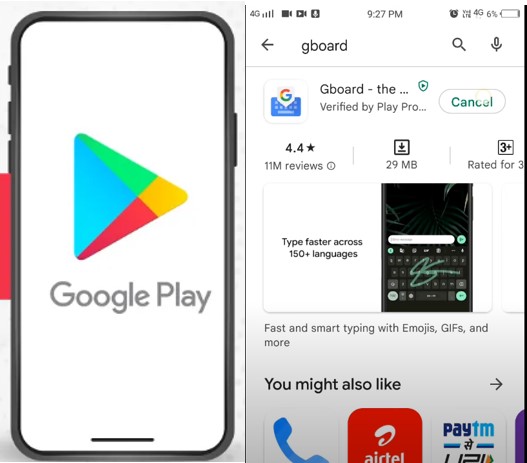
- Open the Google Play Store on your Android device or visit the Google Keyboard page on Google’s website.
- Search for “Google Keyboard” using the search bar.
- Locate the official Google Keyboard app developed by Google LLC and tap on it to open the app’s page.
- On the app’s page, click on the “Install” button to begin the installation process. Review the app permissions and tap “Accept” to proceed if prompted.
- Wait for the app to download and install on your device. The installation time may vary depending on your internet connection speed.
- Once the installation is complete, you can find the Google Keyboard app in your app drawer or home screen.
Note: The installation process may vary slightly depending on your device model and Android version. However, the general steps should remain the same.
Step 1: Access Your Device’s Settings.
To change TouchPal Keyboard to Google Keyboard, follow these steps:
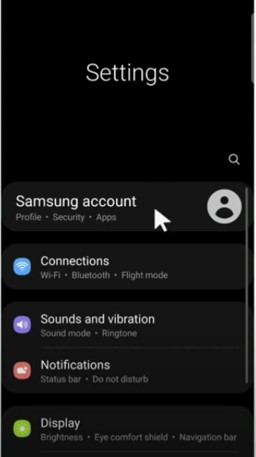
- Unlock your Android device and go to the home screen.
- Swipe down from the top of the screen to access the notification panel.
- Tap on the gear-shaped icon or the “Settings” option. This will open the Settings app.
Step 2: Navigate to the Language and Input Settings
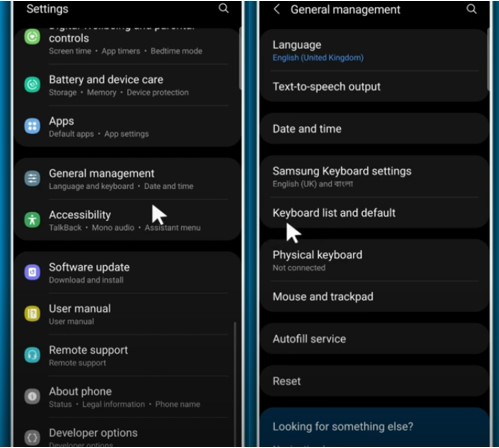
- Open the Settings app on your Android device.
- Look for the “System” or “General Management” section in the Settings menu. It may also be labeled “System & Updates” or “Device.”
- Tap on “Language and input” or “Keyboard.” The exact wording may vary depending on your device and Android version.
By following these steps, you will have successfully accessed the Language and Input settings, allowing you to change your keyboard settings.
Step 3: Manage Keyboards
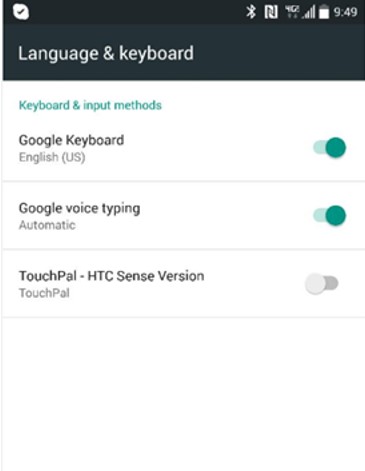
- You’ll find a list of available keyboards in the Language and Input settings.
- Scroll through the list until you locate the “TouchPal Keyboard.”
- Tap on “TouchPal Keyboard” to access its settings and configuration options.
By following these steps, you will have successfully accessed the settings for the TouchPal Keyboard, allowing you to make changes or disable it in preparation for switching to Google Keyboard.
Step 4: Disable TouchPal Keyboard
- Within the TouchPal Keyboard settings, you’ll find an option to disable or uninstall the keyboard.
- Tap on “Disable” to turn off TouchPal Keyboard.
Step 5: Enable Google Keyboard
To enable Google Keyboard as your default input method, follow these steps:
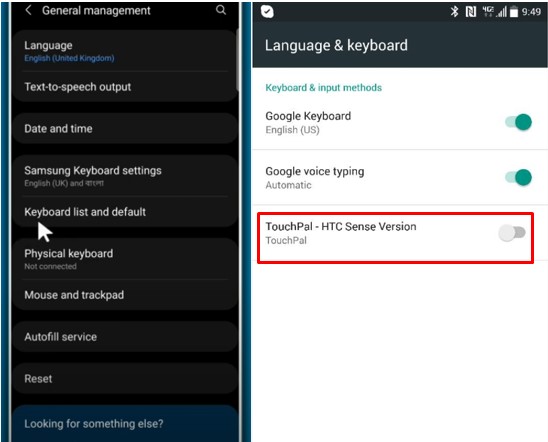
- Go back to the list of available keyboards in the Language and Input settings.
- Select “Virtual Keyboard” or “On-screen Keyboard.”
- Choose “Manage Keyboards” or “Current Keyboard.”
- Toggle on the switch next to “Google Keyboard” to enable it.
- If prompted, grant the necessary permissions for Google Keyboard to function correctly.
Congratulations! You have successfully enabled Google Keyboard on your device. Now you can start enjoying its features and customization options.
Configure Google Keyboard Settings
To configure the settings of Google Keyboard, follow these steps:
Explore the various sections in the settings menu to customize Google Keyboard. Here are some key settings you may want to adjust:
- Languages: Select the languages you want to use for typing. You can add or remove languages as needed.
- Text Correction: Configure settings related to autocorrect, auto-capitalization, and spell check. Adjust the sensitivity or disable these features if desired.
- Glide Typing/Gesture Typing: Enable or disable glide typing, a feature that allows you to quickly type your finger across the keys. Adjust the gesture typing options, such as the trail length or enable/disable gesture deletion.
- Theme and Layout: Customize the keyboard’s appearance with different themes, key colors, or key shapes. You may also have options for keyboard layouts, such as QWERTY, AZERTY, or Dvorak.
- Preferences: Explore additional preferences like key press sound, vibration feedback, and long-press delay.
- Advanced Settings: Dive into advanced settings for more granular control over features like key borders, key press duration, or emoji suggestions.
Now, your Google Keyboard is configured with your desired settings. Enjoy a personalized typing experience that caters to your needs and preferences.
Troubleshooting and Support
If you encounter any issues or need support while using the Google Keyboard, here are some troubleshooting tips:
- Update the app: Ensure you have the latest version of the Google Keyboard installed from the Google Play Store. Updates often include bug fixes and performance improvements.
- Clear app cache: If you experience lag or unresponsiveness, clear the app cache in your device settings to refresh the keyboard’s data.
- Restart your device: A simple restart can sometimes resolve temporary glitches and restore normal functionality.
- Seek online resources: Visit the official Google Keyboard support page or browse online forums for solutions to common issues or to seek help from the community.
- Consider alternatives: If you’re still unsatisfied with the Google Keyboard, try other keyboard apps available on the Google Play Store.
If the problem persists, contact Google’s customer support for further assistance.
FAQs
A: No, the Google Keyboard (Gboard) is primarily designed for Android devices. However, Apple provides its default keyboard for iPhone users.
A: Yes, the Google Keyboard is available for free on the Google Play Store. You can download and use it without any cost.
A: Yes, the Google Keyboard offers customization options. You can choose from various themes, adjust key layouts, and create your personalized theme.
A: No, switching to the Google Keyboard will not delete your existing texts or data. It is simply a change in the keyboard app and does not affect your device’s data.
Conclusion
Changing your TouchPal keyboard to the Google Keyboard can enhance your typing experience on Android devices. With its customizable features, intuitive design, and reliable performance, the Google Keyboard offers many benefits. While the transition may require some initial adjustment, the advantages of using the Google Keyboard are well worth it.
With the simple steps in this guide, you can easily download and set up the Google Keyboard as your default keyboard app. So why wait? Make the switch today and enjoy the benefits of a better typing experience!

I am a regular user of computer keyboards. For using keyboard face different kinds of problems and also solve it very easily. I love sharing knowledge about keyboards.